2.1 Creating Organisation Transport Certificates for SOAP Web Services
This page describes how you create Transport Certificates for accessing Thredd’s SOAP Web Services. As Thredd's SOAP Web Services are secured using Mutual Transport Layer Security (MTLS), your client application must present a trusted Transport Certificate for authentication. The steps described on this page for creating a certificate include those through the Thredd CA dashboard, and also via the command line interface.
2.1.1 Summary of Steps
The steps for obtaining a certificate are as follows:
- Log in to Thredd CA.
- Prepare the new certificate.
- Set up the Certificate Signing Request (CSR) for the certificate.
- Complete creation of the certificate.
- Convert the certificate and key to the Public Key Cryptography Standard (PKCS#12) Syntax (for Windows only).
A CSR is a file that needs to be submitted to the Certificate Authority (CA) for generating a valid certificate.
Certificate Authority (CA)
A CA is responsible for generating and signing certificates, where Thredd uses its own CA.
The following procedure ensures that you create a Transport Certificate from Thredd CA only. You must use certificates from this CA, as self-signed or third-party certificates result in connections being refused.
Storing Generated keys
After generating the private key and CSR on your systems, you must take steps to ensure keys are managed and stored securely.
2.1.2 Prerequisites
The following are prerequisites for creating Transport and Signing Certificates:
- There must be an account on Thredd CA, the application that is required for creating certificates.
- You must have installed OpenSSL on your machine for creating the CSRs.
To access Thredd CA, you must first complete Thredd’s onboarding process. For details, contact your Implementation Manager or Account Manager.
2.1.3 Steps in Setting Up a Certificate
Note that the screenshots below for Private Keys and CSRs contain example data only.
Step 1. Log in to Thredd CA
- Log in to Thredd CA using these links:
- In the Sign-in screen, enter your registered email address and click Cloudentity SSO.
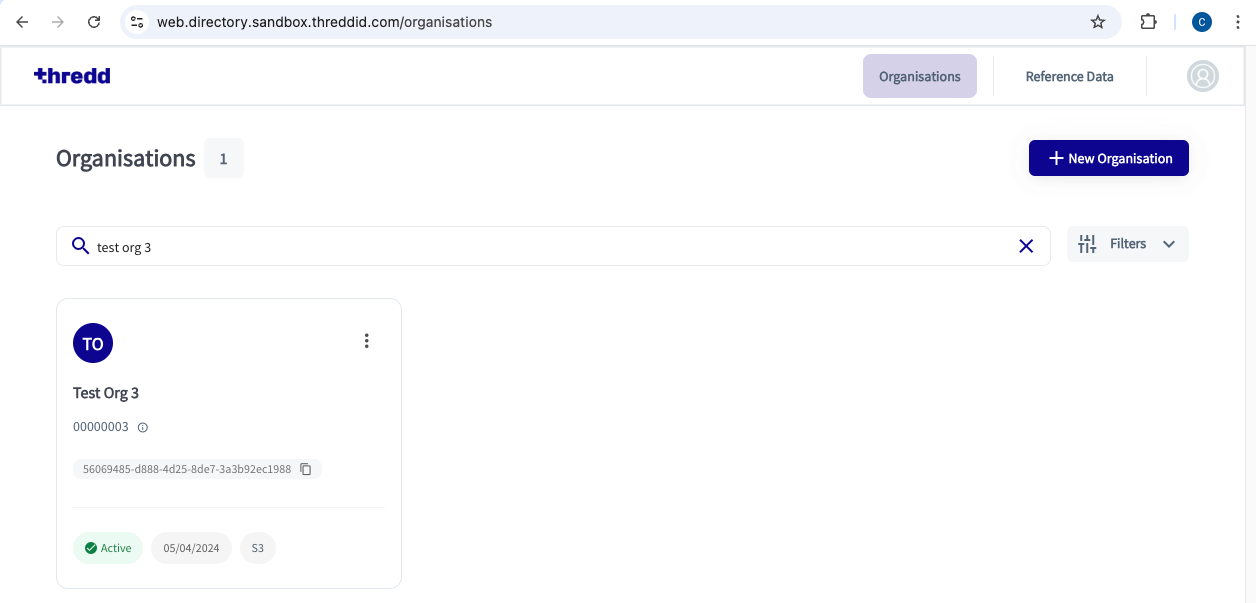
- Follow any other screen prompts or steps provided for your organisation. The Thredd CA dashboard appears with a list of organisations. An organisation appears as a tile as in the following example.
Step 2. Prepare the New Certificate
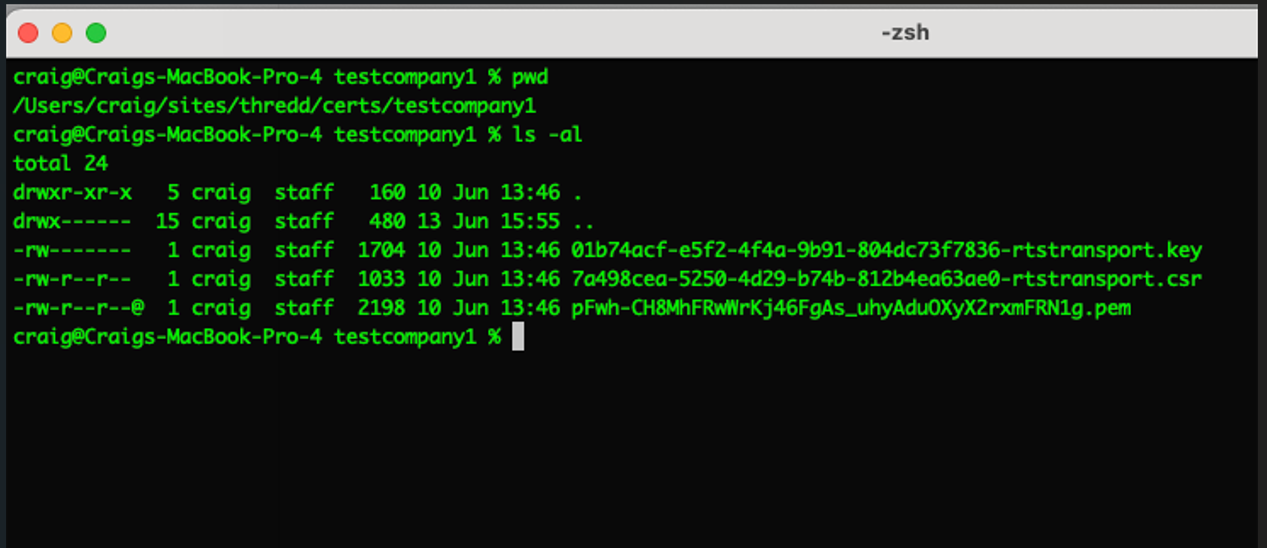
- In a new terminal window, create an empty directory for making and receiving the private key and CSR. The following example shows a key pair and CSR that have been created in a directory.
-
In the Thredd CA dashboard, click on your organisation’s tile.
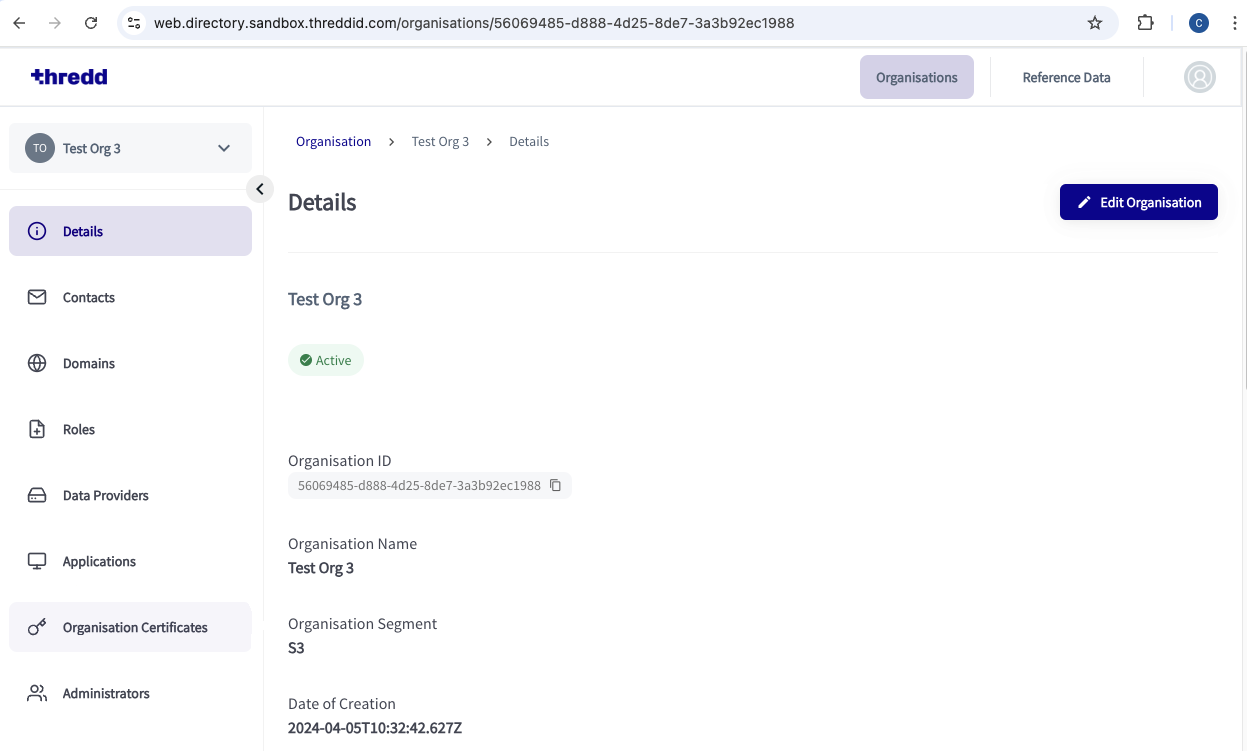
- In the Thredd CA dashboard, select Organisation Certificates.
- Click New Certificate.
- In the New Certificate window, select RESOURCE SERVER TRANSPORT in the Select Certificate Type dropdown list.
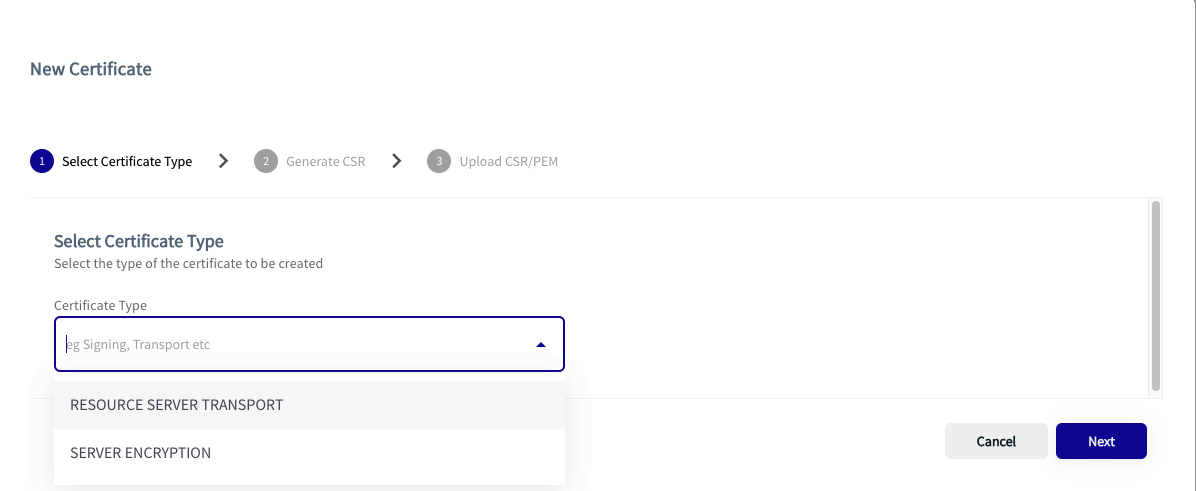
Figure 2: New Certificate Dialog box
- Click Next.
Step 3: Set Up the CSR for the Certificate
- Copy the generated CSR command and paste this into a terminal window.
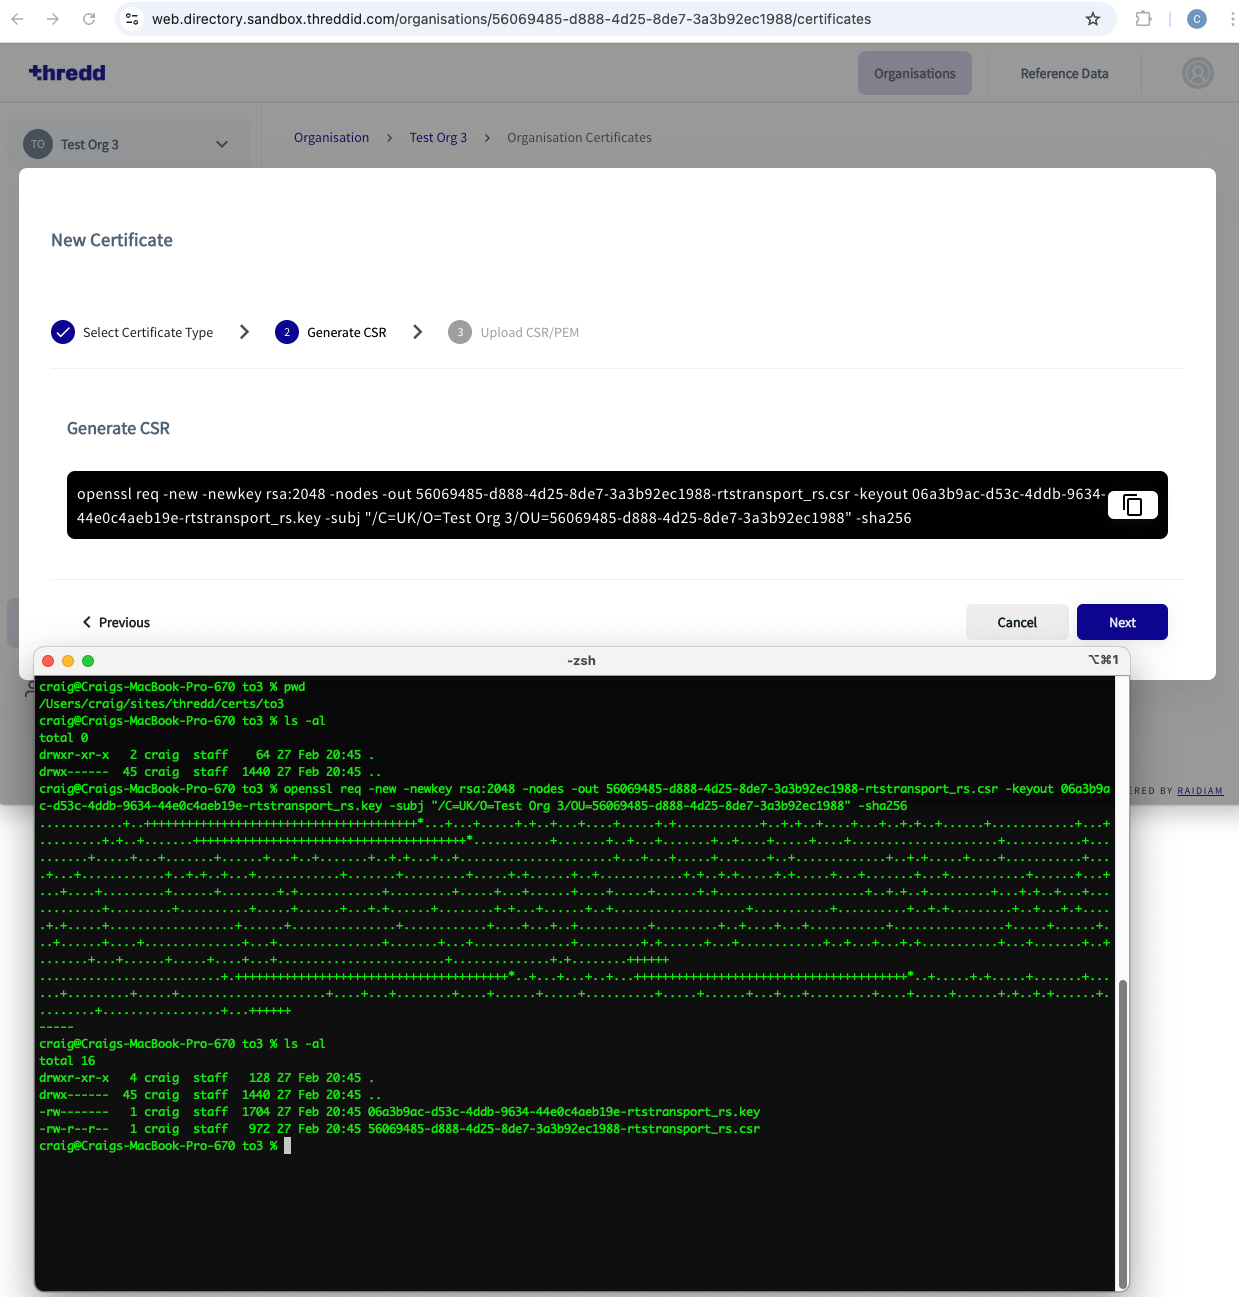
Figure 3: Terminal in the foreground and the New Certificates dialog box in the background
-
Click Next.
- In the terminal window, press Enter to run the OpenSSL command. A Private Key and CSR generates in the background.
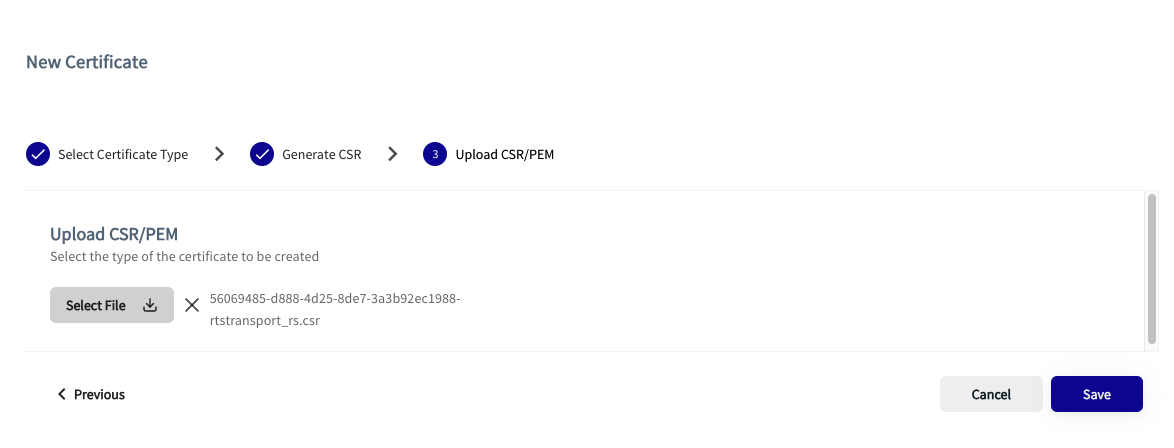
- In Thredd CA, click Select File.
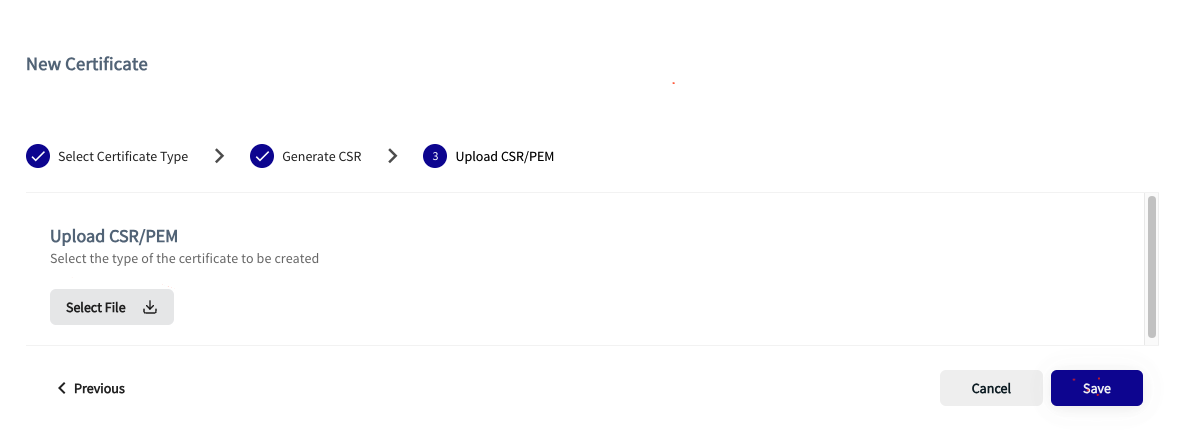
- Browse to the CSR you just created. Then click Open.
Step 4: Complete the Creation of Certificates
- In the Thredd CA dashboard, click Save for the CSR you selected. This allows you to upload the CSR.
When uploaded, the certificate signing happens. This takes place in a few seconds. The newly created Transport Certificate then appears, and is ready for download.
- On the three dots menu for the generated certificate, select Download certificate.
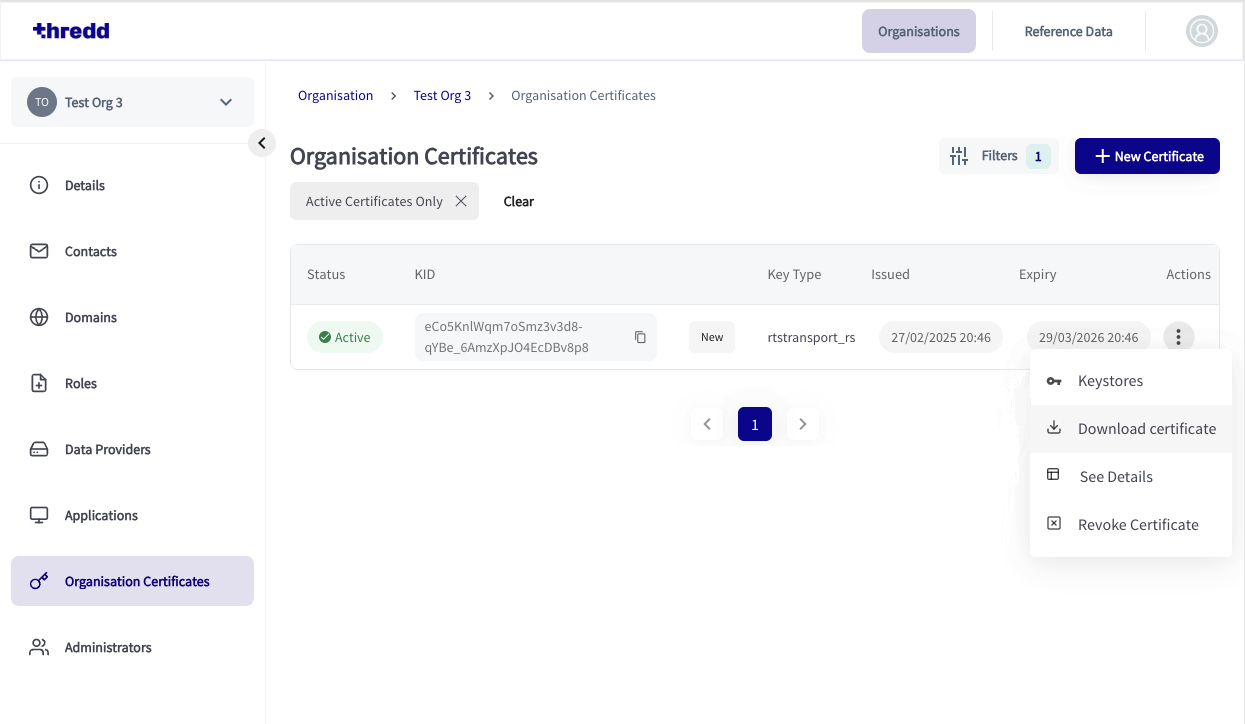
- Click the download link on the CA UI to download the base 64 encoded X.509 certificate that was just generated.
When you’ve completed this process, a JSON Web Key Set (JWKS) endpoint is also created with public certificate details. JWKS is a JSON notation for sharing public keys which are used to verify the signature of a signed JSON web token (JWT).
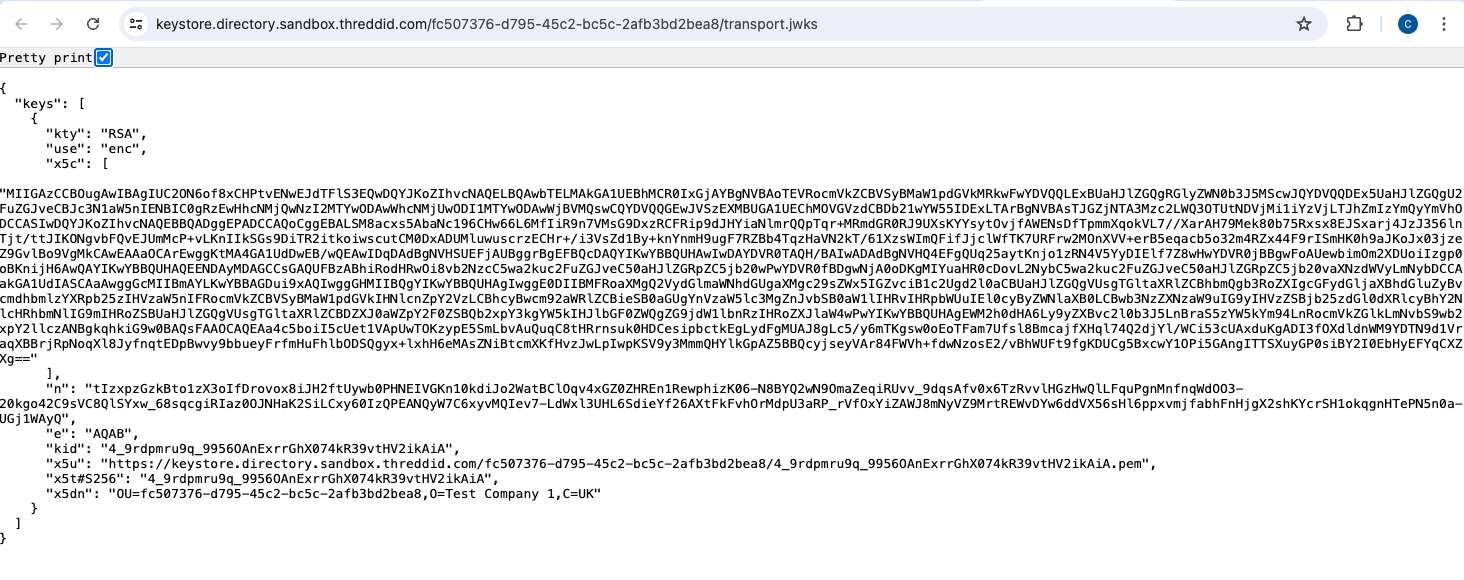
Figure 4: JWKS Certificate
Step 5: Convert the Certificate and Key to PKCS#12 Syntax
If required, for example you are using Windows services, you can convert the public certificate and private key to the PKCS#12 syntax. For converting, you can use OpenSSL commands. In the PKCS#12 syntax, the files are in the .pfx format. For more details, see RFC 7292: PKCS #12: Personal Information Exchange Syntax v1.1.