Managing Incidents
You can use the Incidents section of the portal to view and review incidents. Depending on your permissions and your configuration, you can:
-
Review individual alerts in an incident as either 'Risk' or 'No Risk'
-
Place incidents in a 'Pending' list to await further information
-
Add entities or other information to data lists (negative lists, positive lists, watch lists, etc.)
You can also:
-
View detailed information about an incident (See Incident Review Page), including tags and other information added by the portal engine
-
View the entity and its activity over time
-
View other users' activity related to that entity (e.g. previous incident reviews)
Click the Incident button in the portal header to open the Incidents page.
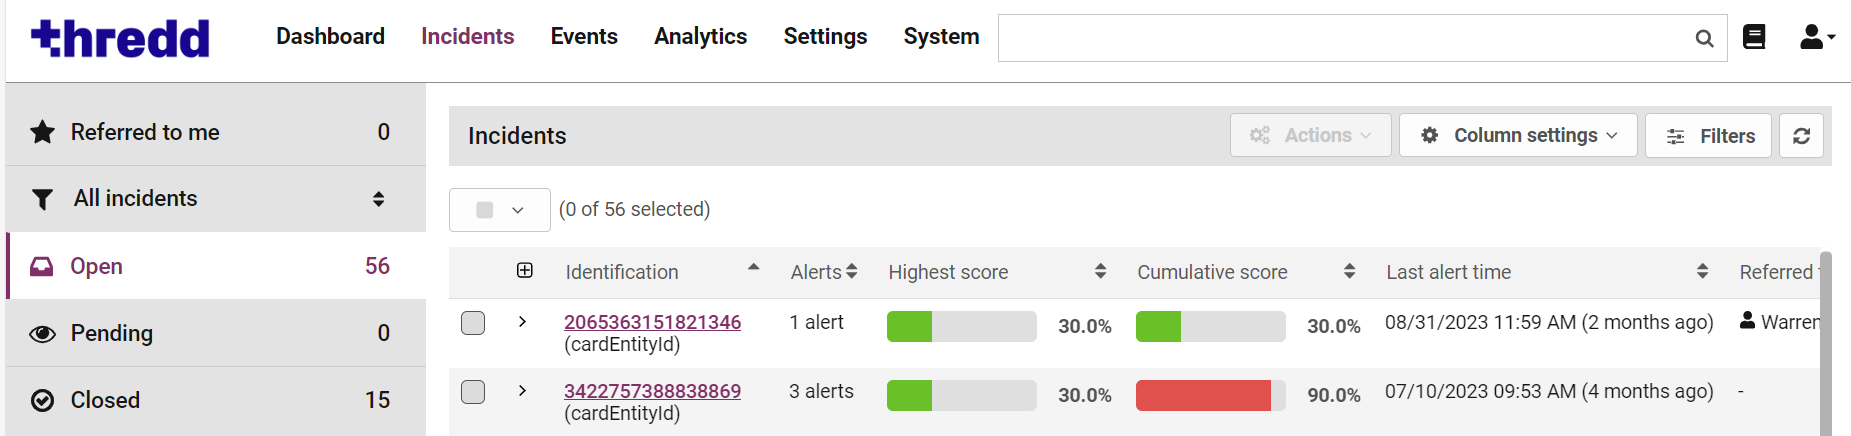
Figure 4: Open Incidents page
Risk score availability is subject to eligibility criteria. If your programme is not eligible for risk scoring, then risk scores displays as greyed out or zero.
The Incidents page consists of a sidebar that contains links to different lists, and a list that displays incidents based on the list selected from the sidebar. The numbers displayed to the right of each list indicate the number of incidents included in each list.
|
List |
Description |
|---|---|
|
Referred to me |
Displays unreviewed incidents which have been assigned to you (or your team). |
|
Open |
Displays all unreviewed incidents. The Open list displays when you first open the Incidents page. |
|
Pending |
Displays incidents which have been specifically sent to this list. This list keeps tab on suspicious entity activity which is not decisively 'Risk' or 'No Risk', or ensures that an incident is not reviewed by other users while you are waiting for additional information. |
|
Closed |
Displays details of incidents that have been previously reviewed as ‘Risk’ or ‘No Risk’. You can only manually return entities in the Closed list to the Open list by creating a new alert under the entity. For details on creating an alert, see the Rule Builder section of the Fraud Configuration guide. |
Open Incidents Page
The Open Incidents page provides a list of open incidents, and displays by default when clicking the Incidents button. Each incident on this list consists of one or more alerts to review.
To display newly-raised incidents: click  .
.

Figure 5: Incidents Page
You can expand an incident and view more details by clicking on the down arrow next to the entity ID.
![]()
Figure 6: Incident drop-down
To expand all the rows on the page, click the  button in the list header.
Managing Incident Columns
You can choose which columns to view in the main Incident List by using the Column Settings button at the top right of the dashboard. Depending on how your portal is configured, available columns can include:
-
Identification — The unique ID of the entity associated with the incident.
-
Alerts — The number of unreviewed alerts the incident contains.
-
Highest score — The highest risk score for any of the incident's unreviewed alerts.
-
Cumulative score — The sum of all risk scores for all the incident's unreviewed alerts.
-
Scam Detect Score - The scam score for the incident.
Scam Transaction Monitoring is an optional feature which analyses transactions for potential scam events. For information on setting up and using Scam Transaction Monitoring , either speak to your account manager or see the Scam Transaction Monitoring Guide.
-
Last alert time — The date and time of the most recently triggered alert.
-
Referred to — The user/team assigned to review the incident (if any).
-
Viewing — The user currently viewing the incident's review page (if any). If another user is viewing an incident, it is locked. To unlock an incident that another user is reviewing, click
 .
. -
Tags — The list of tags output by rules/models for any of the unreviewed alerts that make up the incident.
-
Models — The models contributing to the incident's risk score.
-
Rules — A list of Business Rules triggered by any unreviewed alerts.
Any change that you make is specific to you. Logging out of the Fraud Portal automatically saves to your username.
Filtering Incidents
The following section details how to use filter incidents using pre-set filters created in the Settings page.
Pre-set incident filters
Users with pre-set filters assigned to them select different filters from the All Incidents drop-down menu in the sidebar on the left-hand side of the page.
For information on creating filters, see Incident Filters.
Those without any pre-set filters assigned to them only have the All Incidents option available to them.
-
To activate a pre-set filter: click All Incidents in the sidebar and select a filter in the drop-down menu.
-
To deactivate a pre-set filter: select All Incidents from the incident filter drop-down menu in the page sidebar.
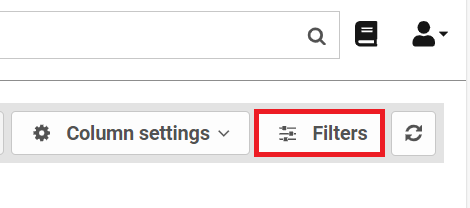
Using the Filters sidebar
Click Filters at the top right of the Incident List page to filter incidents based on:
-
Date range: show only incidents where the latest alert in that incident was generated between two times.
-
Rules: show only incidents where the selected rules triggered for at least one alert in the incident. Rule descriptions, if configured, are not visible in this sidebar.
-
Models: show only incidents where the selected models assigned a risk score to at least one alert in the incident.
-
Filter by highest score: show only incidents where the riskiest score is between the minimum and maximum score you set using the Filter by highest score.
Any active incident filters apply to all the Incident Lists:
-
Open
-
Closed
-
Pending
-
Referred to Me
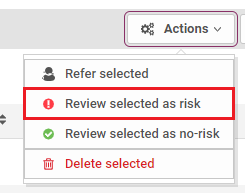
Bulk Actions
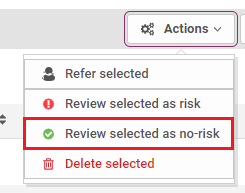
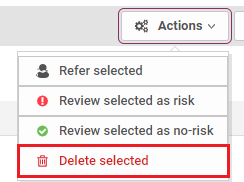
The Actions button at the top right-hand side of the Incident List lets you modify or delete multiple incidents. By combining this functionality with filters, you can modify or delete incidents that match your filtering criteria.
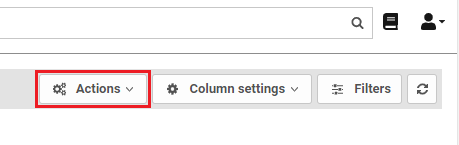
Figure 7: Incident Actions menu
Bulk Incident Referrals
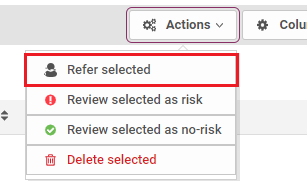
To select multiple incidents for referral in bulk:
-
Tick the incident check boxes on the left, or use the check box at the top of columns, to select one or more incidents to refer (you can select incidents on multiple pages of the same list, but not incidents from multiple lists).

-
Click Actions and select Refer Selected from the menu.
A window will display.
-
Select the team or user to refer these incidents to from the Refer To menu.
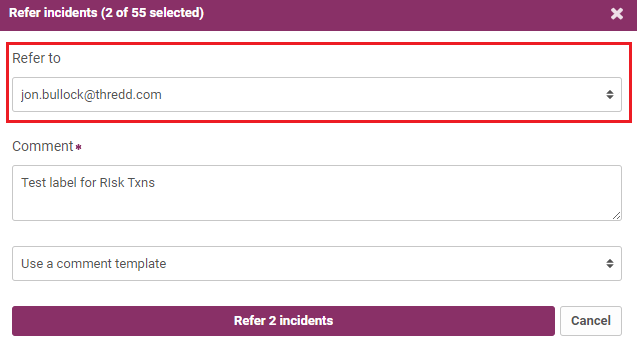
-
Add a comment or select a comment template from the menu.
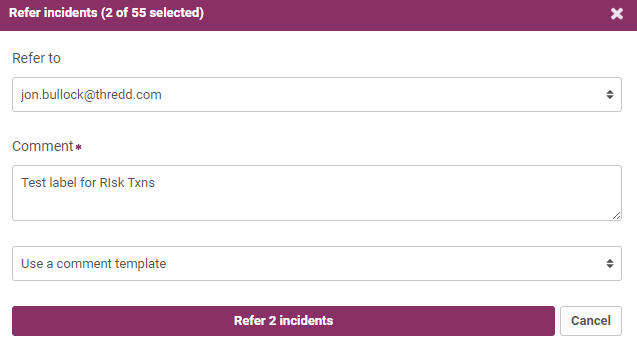
-
Click Refer Incidents. Note that the button will be renamed depending on how many incidents you have selected.
Bulk Incident Reviews
To select multiple incidents for review in bulk:
-
Tick the incident checkboxes on the left, or use the checkbox at the top of columns, to select one or more incidents to review. You can select incidents on multiple pages of the same list, but not incidents from multiple lists.
-
Click Actions.
-
Either:
-
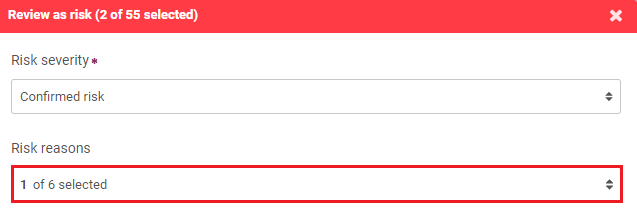
Review all incidents as 'risk':
-
Click Review Selected as Risk.
A window will display.
-
Assign a risk severity (confirmed or suspected) to all the alerts in the incidents by selecting it from the 'Risk Severity' drop-down list.

-
To explain your decision, select one or more risk reasons from the 'Risk Reasons' menu; these apply to all alerts in the incidents you have selected. You can assign multiple risk reasons to the incident. The assigned risk reasons appear beneath the 'Add a Risk Reason' menu. To remove a risk reason, to the right of its name, click .
-
Add a comment to the Comment field or select a comment template from the menu.

-
-
Or, to review all incidents as 'no risk':
-
Click Review Selected as No-risk.
-
To explain your decision, select one or more risk reasons from the 'No Risk Reasons' menu; these apply to all alerts in the incidents you have selected. You can assign multiple no risk reasons. The assigned no risk reasons appear beneath the 'Add a No Risk Reason' menu. To remove a no risk reason, to the right of its name, click .

-
Add a comment to the Comment field or select a comment template from the menu.

-
-
-
Click Review Incidents.
Bulk Incident Deletions
To select multiple incidents for deletion in bulk:
-
Tick the incident check boxes on the left, or use the checkbox at the top of columns, to select one or more incidents (you may select incidents on multiple pages of the same list, but not incidents from multiple lists).
-
Click the Actions button.
-
Click the Delete Selected button. This cannot be undone and will require you to confirm you want to proceed.
Not all bulk actions will be available to all users as these actions are determined by user role.